I finally buyed a mechanical keyboard ! The CM storm quick fire XT - cherry MX brown, qwerty US.
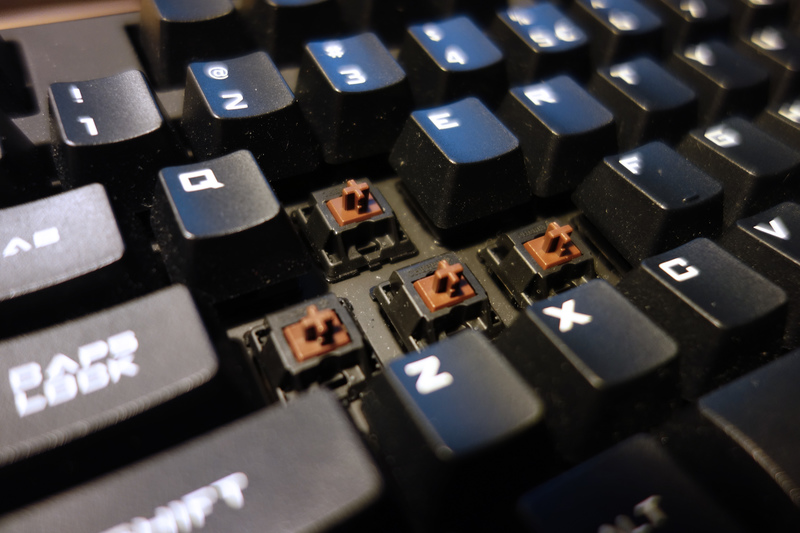 Cherry MX brown switch, classic and efficient
I chose this model carefully. It’s one of those who have a detachable controller chip (on most models it’s soldered on the PCB). This means that we can replace it with a programmable controller ! That’s why I ordered a custom controller named ghost squid !
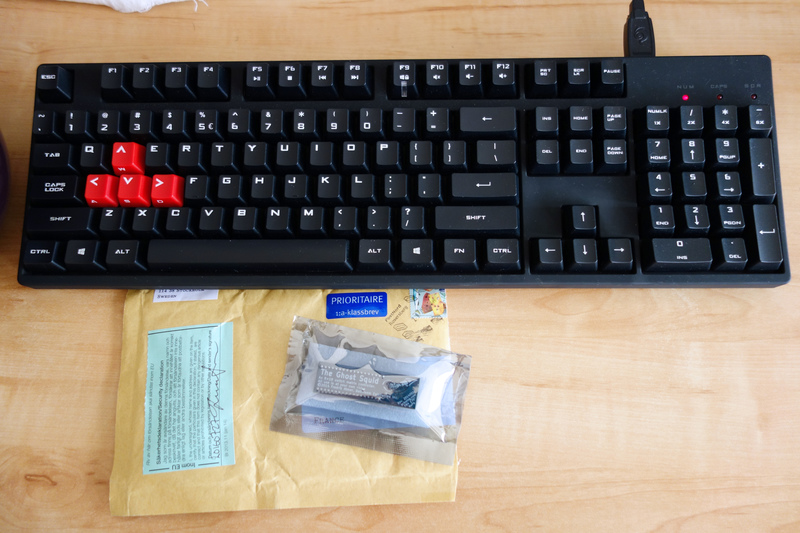 Everythings here, ready to go!
But where does this special controller come from ? Well, it was designed by a swedish guy known under the nickname bpiphany. You will find all the available controllers and associated keyboards on his website.
This video show the installation of a frosty flake controller on a CM storm quickfire-rapid. It’s detailed and sum up almost everything I’m gonna cover here.
Here is the whole process
Controller installation
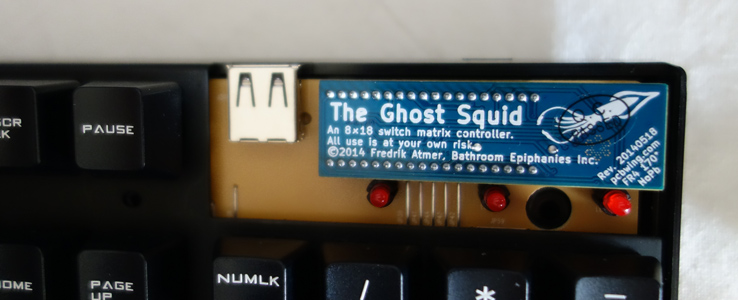
Here is the beast !
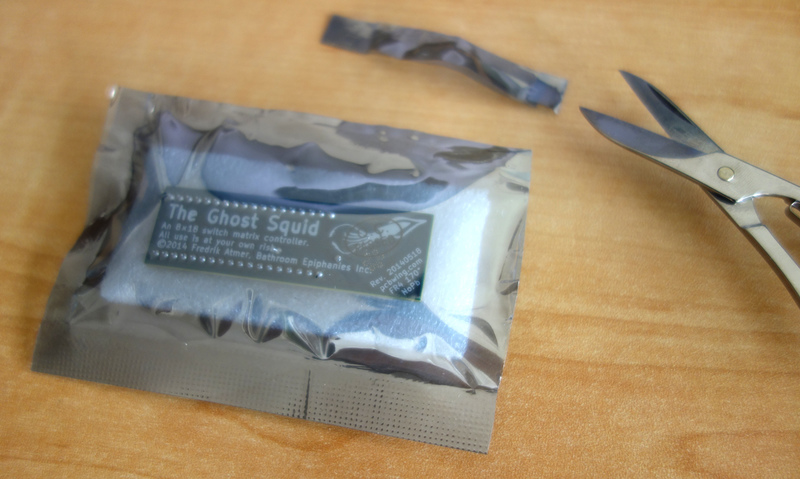 Unboxing time
First I have to say that the shipment of the chip I ordered to bpiphany was really fast (received it 2 days after my payment). The guy is super reactive and kindly answered all my questions. So maximum reliability enabled ;). The controller comes well protected in bubble wrap and an antistatic bag
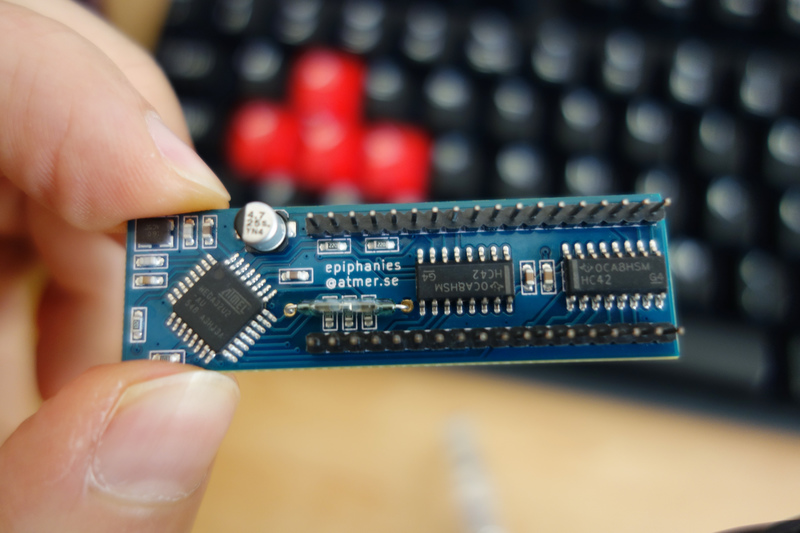 The tentacles of the ghost squid
The backside of the printed board contains the circuit and the reed switch (transparent tube just under the mail) to trigger the bootloader, I’ll come back to this later, just remember where it is.
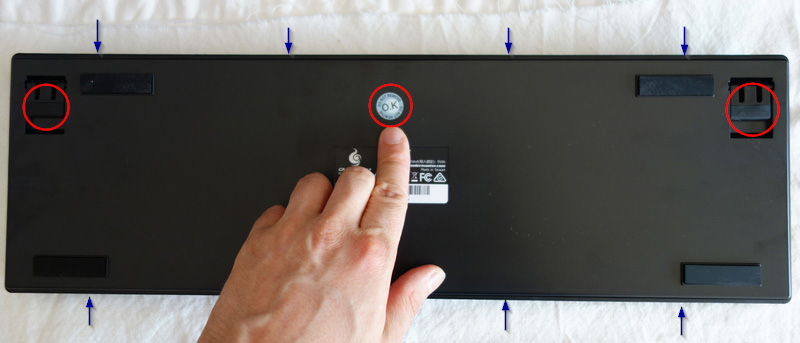 Red circles : screws positions, arrows : clips positions
It’s time to happily void the warranty (the small sticker pointed by my accusing finger). So yes, there is a bad side, as you open the keyboard you are canceling the warranty. But no surprise here, it’s the same with almost all electronic devices. Carefully check that everything works correctly on your keyboard before starting the operation.
 Opening the treasure box
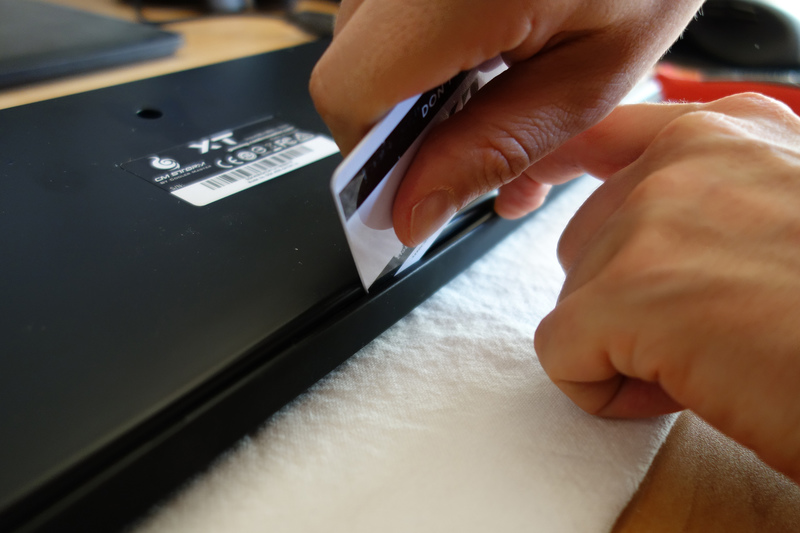
Once unscrewed it’s time to open the case, there are 4 clips that maintains the two parts together on the QF-XT. Take one of your old student card and slide into the gap.
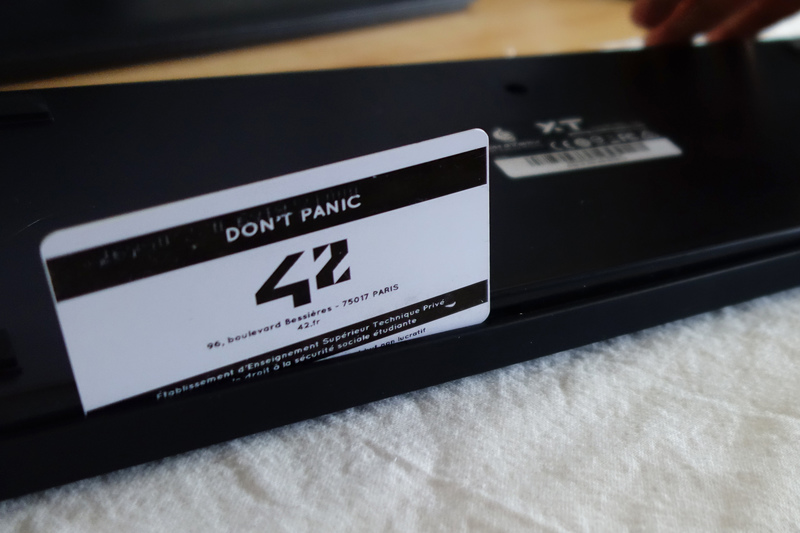 My 42 school card, an appropriate tool ^^
Don’t hesitate to force a little.

The top part removed, you just have to pull the original controller.
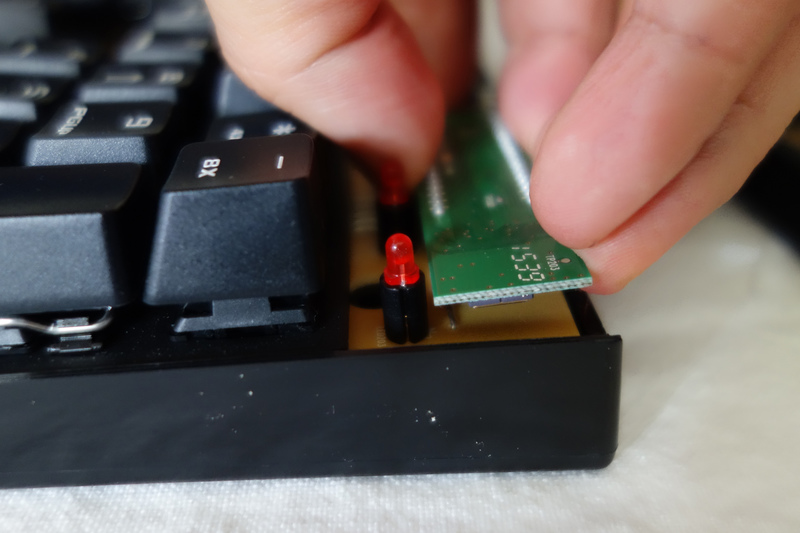
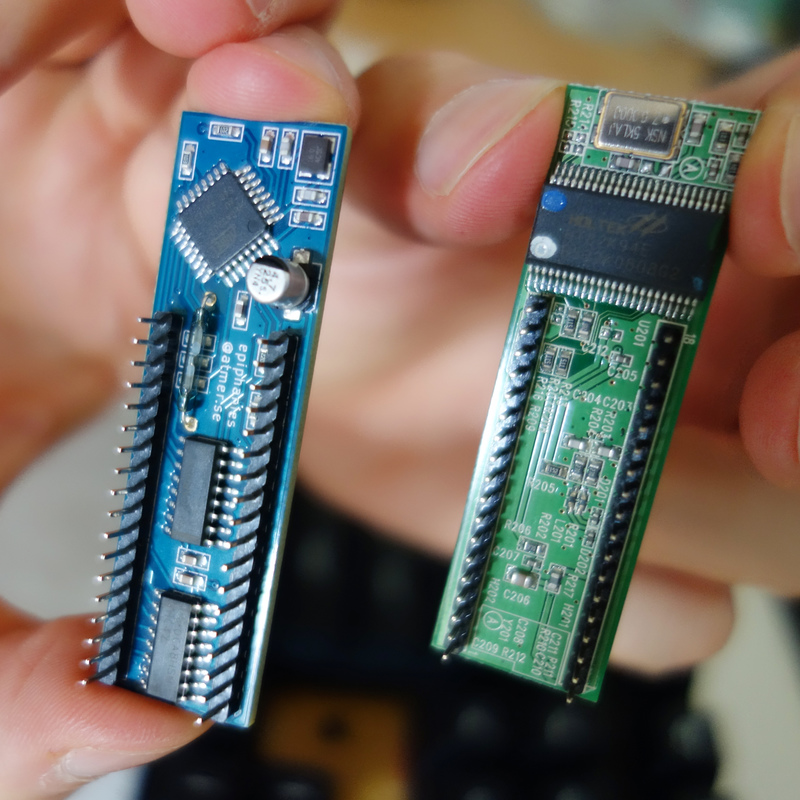 Just for fun, the two chips side by side
Keep in mind that you can put it back if you have any problems with your new controller or if you want to restore the keyboard to the original state.
 So classy (even if hided in the case after)
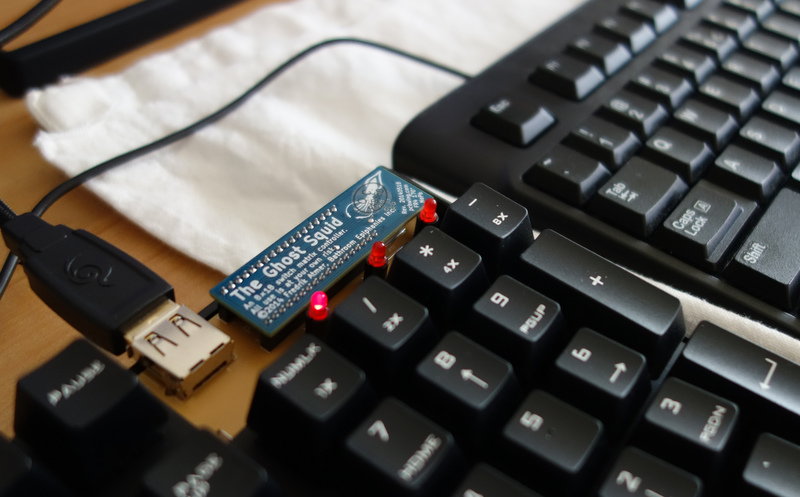
And here it is ! The ghost squid is the new commander. There is a chance that a firmware is already loaded so the keyboard may work immediately. If it’s not, don’t panic (not yet ^^). Don’t close your case until you have loaded your own firmware. About that, let’s see how to create a layout.
Create and export a layout with EasyAVR to USB
easyAVR (by metalliqaz) is certainly the easiest way to create its firmware (It has a GUI !) If you are a more programmer kind of guy you’ll certainly prefer other firmware (the list is available here) I asked bpiphany about the tools to create layouts and firmwares (according to my personal purpose). He answered: Easy AVR - easiness to make layers/macros/funstuff, nkro, media and mouse keys tmk - easiness to hack in very cool ways, nkro, media and mouse keys
For eAVR you will find more information on the dedicated geekhack thread.
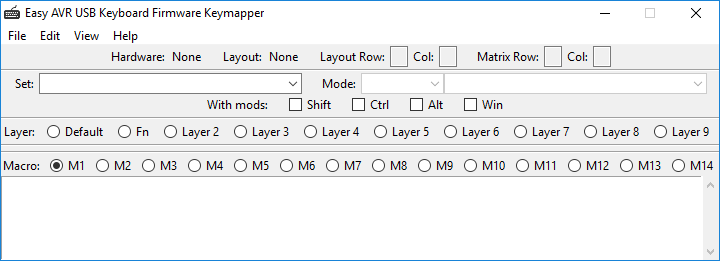
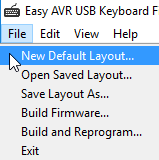
Here I’m gonna describe the procedure for windows (yeah I know…): Download the latest build on the deskthority wiki page Unzip the folder and launch, you’ll get this:
New layout…
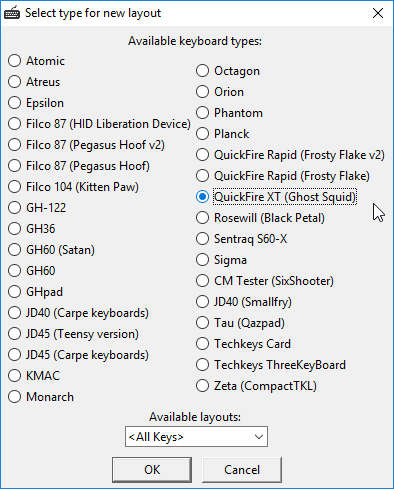
Choose your keyboard model in the popup menu. The “All keys” field at the bottom let you choose between ISO and ANSI (if you can’t tell the difference, read this page, I also made an article about that but its in french…)
Then you have 3 was of changing the keys once you’ve selected one: 1. Tap directly on your keyboard (you better have another working keyboard near you for this and for debugging purpose during the flash) 2. Look for your key code in the scancode combo-box 3. Use the key-picker, accessible with the view menu
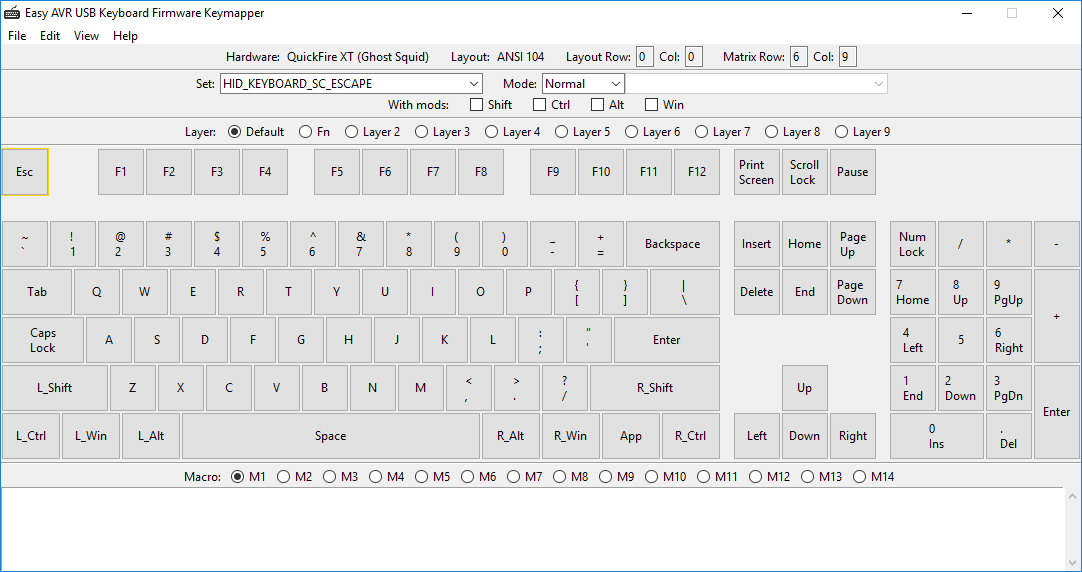
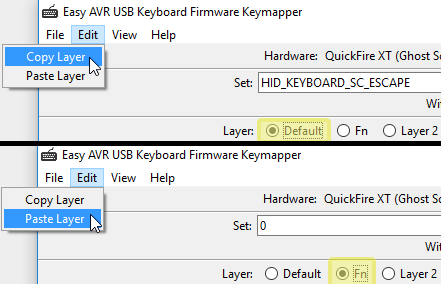
The Default is you base layout. it is simpler to duplicate this one on the function layers with copy/paste layer function.
The boot mode
Here is the important part: Going in boot mode put the keyboard in “flashable mode”
The reed switch allow you to launch the bootloader by briefly passing a magnet over the controller. To leave the boot mode just unplug/replug the keyboard.
That’s why you have to place the “boot mode” scancode somewhere in your layout. it will allow you to go in flash mode without hardware manipulation (just a key combination). The magnet will just be a fallback in case you messed up you’re firmware configuration later.
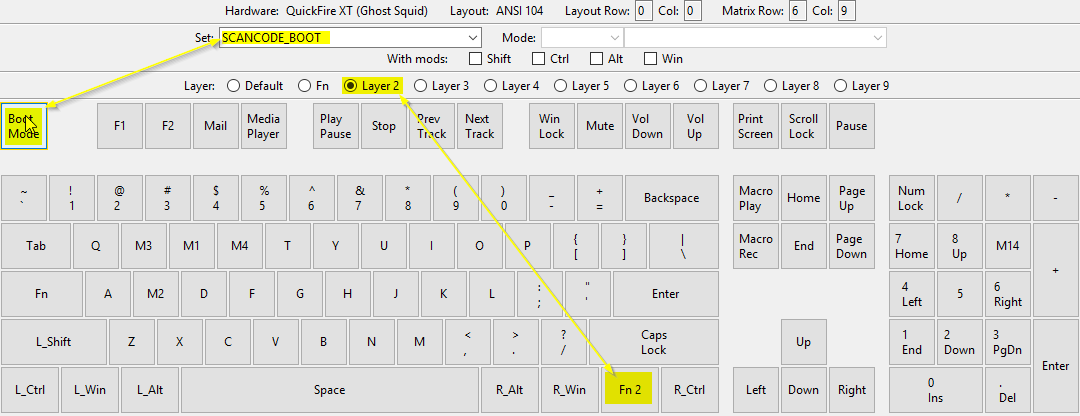
Here my boot mode shortcut is placed in my 2nd function layer, so my combo si Fn2+Esc (Don’t forget to place the Fn2 key on your default layer or you will not be able to access to layer 2 and thus boot mode)
Hint : If a firmware was already loaded in the chip when you received it it’s possible that a shortcut exists to go into boot state. Try pressing simultaneously the two shift keys (that’s the combo used by bpiphany, it worked for me). If nothing happen, you’re good to go with the magnet.
Once your layout is ready, save it (.dat) to tweak it later and compile the firmware (.hex), all done under the File menu.
Then, switch to another software to load the hex file in the chip.
FLIP FLASH
If you are on windows, download FLIP on the Atmel website(there is a buy button but the tool is free) I chose “FLIP 3.4.7 for Windows (Java Runtime Environement included)” If you run another OS you’ll need dfu-programmer
Put your keyboard into boot mode then launch the software (here FLIP).
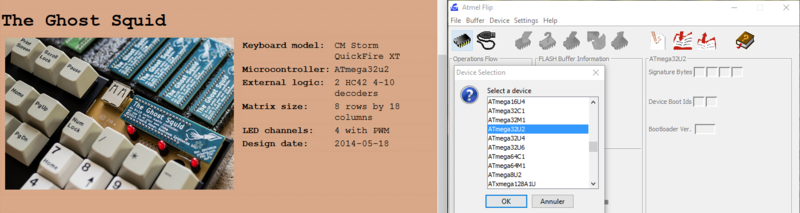
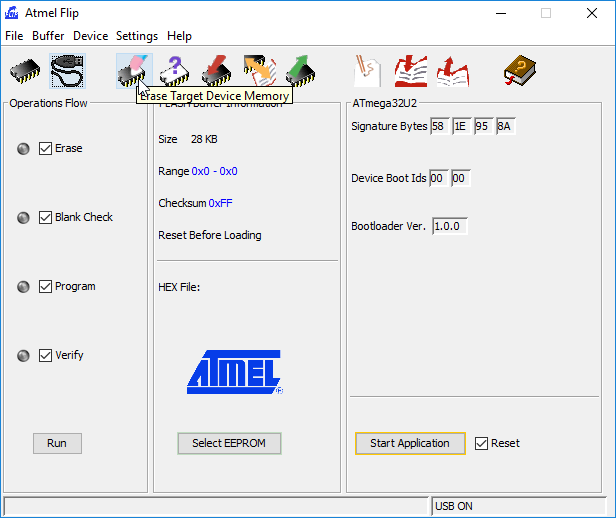
Click on the chip icon and choose the type of chip, here a ATmega32u2 as specified on bpiphany website.
Then click on the USB cable icon to establish the connection.
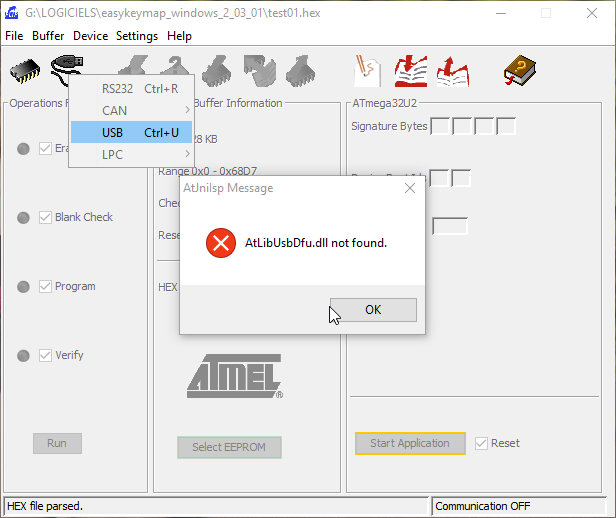
This is where it goes a bit frustrating (at least on windows)… You will probably have an error message “AtLibUsbDfu.dll not found”. It’s because a driver for FLIP is missing (it is stored in the installation folder), this video explain very well how to fix this.
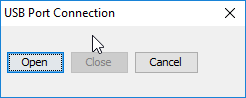
Once the driver thing is OK and the USB port is open you’re at the climax!
The time has come for a little sweat with the final step : the flash…
Firmware flash
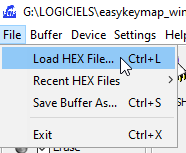
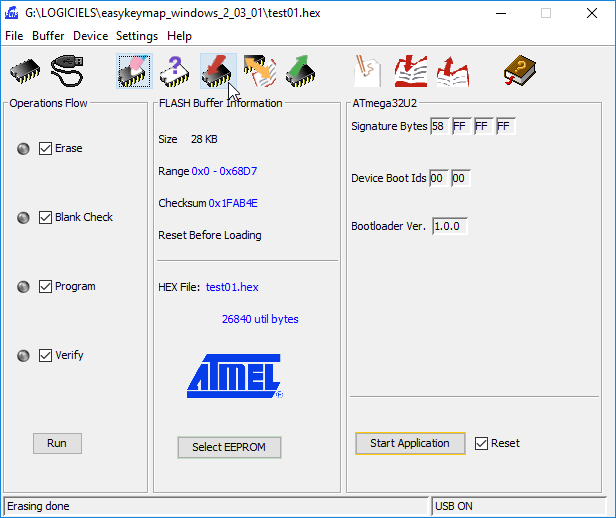
Load the compiled firmware.
Erase the memory (don’t worry, the bootloader is’nt affected).
Then Click on the transfert icon. Hold your breath during the final flash (there is no reason for it to go wrong but there is always a sort of flash effect in the users brain!)
Once finished, disconnect and reconnect your keyboard. If it works, this is it! If not, retry the flash then go directly post your problem in the geekhack thread (I’m a real noob so I could not help you).
The result
Now you just have to close the case and enjoy, test, change layout, macros (you can store 14 of them with eAVR) and reflash ! I already did it 3 times smoothly.
Here is my current Fn layer. Access through the useless capslock key while pressed (note that you can make it a toggle)
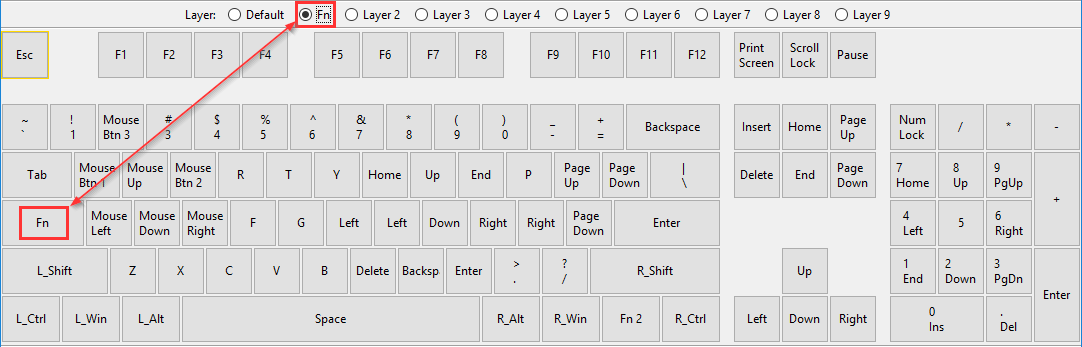 My function layer, note the mouse control over wasd
And there it is ! A great and cheap programmable keyboard ! #Joy #Freedom